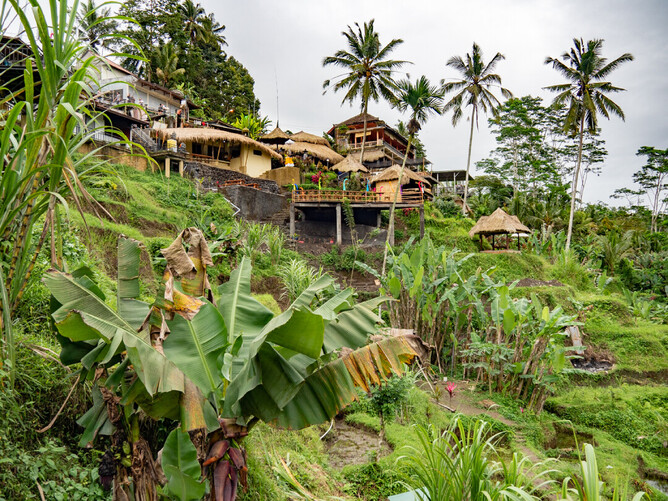
Planning a winter escape to Bali? If you’re one of the many Kiwis looking to hop up to Indonesia for a mid-winter break, sorting your visa in advance is one of the easiest ways to skip the queues and start relaxing sooner.
Since 2022, Indonesia has offered an eVOA (Electronic Visa on Arrival) that lets you apply online before you travel - perfect for travellers who like everything sorted ahead of time.
In this step-by-step guide, I’ll walk you through how to apply for your Bali eVOA, what documents you’ll need, common mistakes to avoid, and a few handy tips to make the process smooth from start to finish.
(Note: Visa information can change - this guide reflects my experience as of July 2025)

e-VoA or VoA for Bali: What's the difference?
If you've been to Bali before, you may remember that it used to be a simple matter of turning up at the airport, handing over some USD or your credit card and getting a stamp in your passport.
In reality, not much has changed - it's just that the "Visa on Arrival" ("VoA") process for tourists can now also be done online in advance (this is the "e-VoA").
Both options give you a B1 Tourist Visa valid for a stay of up to 30 days in Indonesia.
TOP TIP: Make sure you don't apply for your e-VoA any earlier than 90 days out from your arrival in Indonesia or the visa validity will have lapsed.
What documents do I need to apply for my e-VoA?
To complete the online application you'll need the following documents handy to upload:
An image file copy of your passport (JPG or PNG)
A passport photo of yourself (more on that below)
A PDF copy of your passport
A PDF copy of your flight itinerary or e-ticket (must show you leaving Indonesia)
You'll also need to know the address of the resort or villa you're staying at (if you're going to be moving around, just choose the first one), and have a credit card to charge the visa fee to (approx $50-60 NZD).
TOP TIP: While technically your New Zealand passport only needs to be valid on arrival in Bali, to apply for the e-VoA you need to have a minimum of 6 months left on your passport before it expires.
The e-VoA application process
The Indonesian Ministry of Immigration have done a nice revamp on their visa website that takes you step-by-step through the e-VoA application process, but there are some steps that might catch you out.
Click to APPLY HERE through the official immigration website.
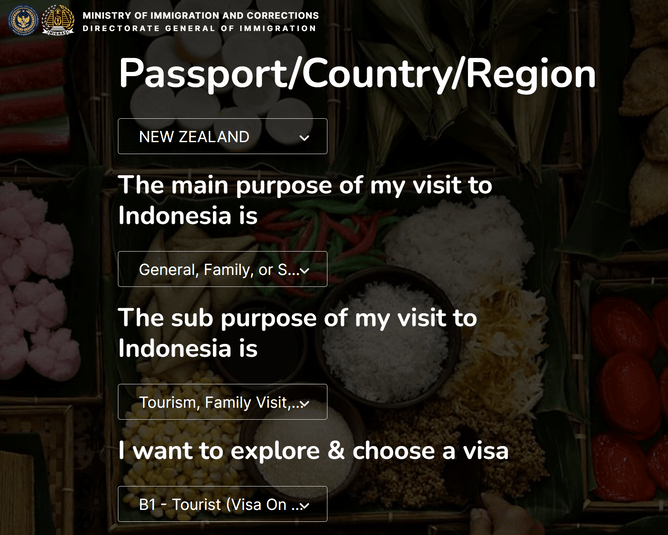
STEP ONE: Passport/Country/Region
Scroll down through the drop-down box to select the nationality of the passport you're using to travel to Indonesia. This may be different to the country you live in!
STEP TWO: The main purpose of your visit to Indonesia
For most New Zealanders heading to Bali on holiday, you'll need to select "General, Family or Social", followed by a sub-purpose of "Tourism, Family Visit and Transit".
You'll then be able to select your type of visa as "B1 - Tourist (Visa on Arrival)" - which covers travel for:
A holiday
To attend a retreat or conference
To receive medical treatment
Next Steps
Once you've completed all of the drop-down boxes on the homepage, click the yellow "Detail & Login" button to proceed with your e-VoA application.
A page will come up with details of what the B1 visa involves - have a read through this and if you're happy click through to "Apply".
The next page is where you need to input your information and upload your documents.
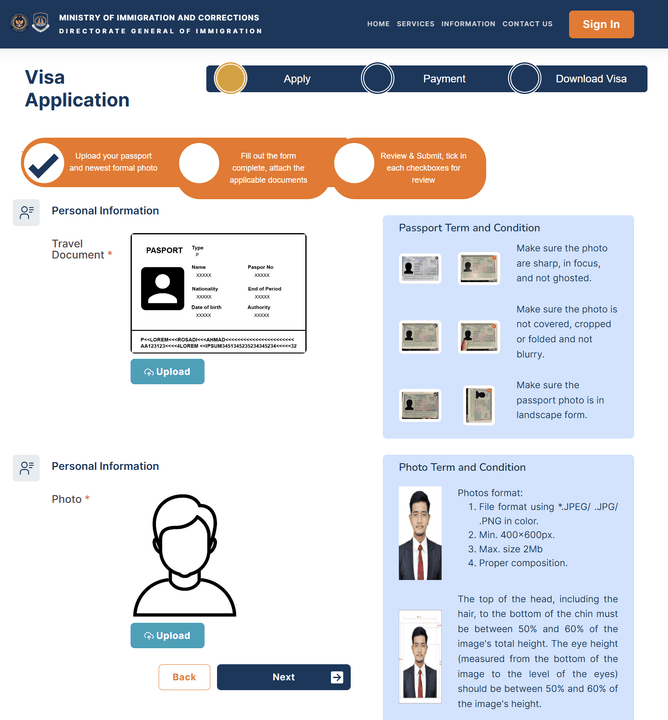
STEP ONE: Passport upload
This is where you upload a photo of the information page on your passport - that's the one that has your photo etc on it. This needs to be an image file - so JPG or PNG - and in landscape orientation. If your image file has flipped around to portrait orientation you'll need to edit the file (in your Windows file, just right click on the image file and then select "rotate").
STEP TWO: Personal photo upload
This needs to be a clear (not blurry) photo of yourself taken in standard passport-photo style -
Head and shoulders, facing straight on to the camera
No headwear or glasses
Leave plenty of space around your head (the exact details are on the site)
Plain, light background
TOP TIP: The system will compare this photo of you with the photo on your actual passport, so make sure they look the same!
If you don't have a photo with a plain background you can submit a photo that has had the background removed (ie: using Canva or other photo editing tools) as long as you replace the background with plain white rather than leaving it transparent.
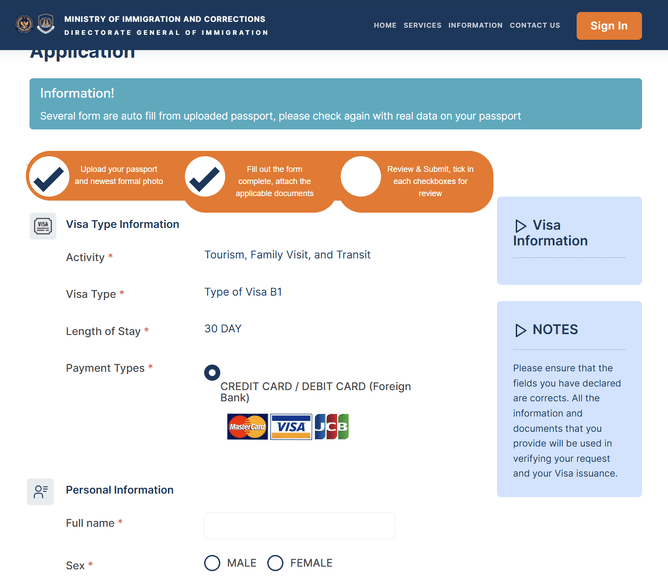
STEP THREE: Personal Information
Type in the Personal Information and Passport Information, making sure what you put in matches your passport EXACTLY.
In particular - check your Place of Birth and Issuing Place (in New Zealand passports this is "Te Mana Tuku/Authority", you'll find it next to the expiry date).
TOP TIP: Your passport Nationality will already be filled in as "Selandia Baru" (for New Zealanders) and in grey so you can't change it. Don't panic! This is just the Indonesian word for "New Zealand".
STEP FOUR: Address in Indonesia
This is where you enter your hotel or resort details. Unless you're staying in someone's private home you'll most likely need to select "hotel" from the drop-down menu.
TOP TIP: Keep the address as simple as possible - the system will show you a red error box if you try and put in too much information. You literally just need the name of your resort + the postal code and the rest of the information will auto-generate for you.
STEP FIVE: More Document Uploads + Contact Info
This is where you need to upload the PDF version of your passport (yes, the same passport you uploaded in Step One) and a copy of your flight ticket - this HAS to show a flight departing Indonesia, so if you are travelling on multiple tickets upload that one that shows your flight from Bali to your next stop.
Check over your information one more time to make sure it's all correct, then click the blue "Next" button to move on to the next step!
Check your details (again) and pay...
On the next screen you'll be asked to confirm your details with tick boxes. Once the visa has been processed you won't be able to change any of these details so it's important to make sure they're correct first time.
TOP TIP: Your passport's Date of Issue will auto-populate as today's date so make sure you change it!
Once you've completed this page and clicked through to process the visa you'll be given an application number - COPY AND SAVE THIS NUMBER - If you have any issues with the payment you'll be able to go back into your application using this number and your passport number as a reference so you don't have to re-do the entire application.
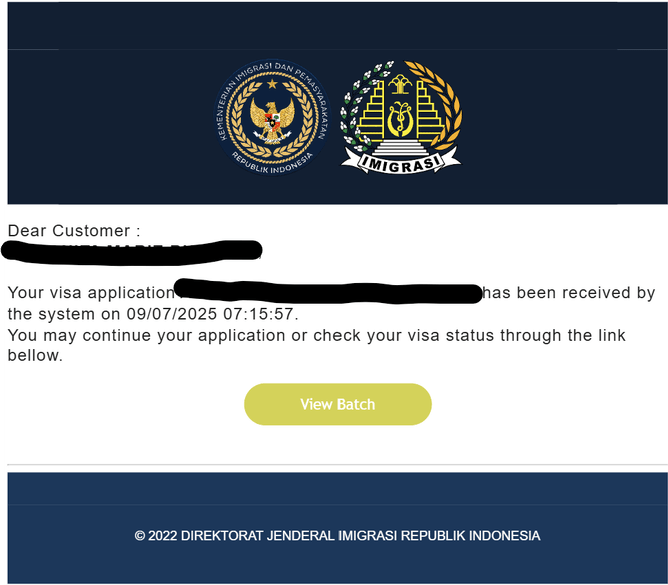
You should at this point also receive an email confirming that your visa application has been received.
Clicking on the green "View Batch" button in this email will take you through to your application where you can then click through to make payment via a secure link with your credit card.
Once payment has successfully been processed, you should receive confirmation of your approved visa within a few minutes.
My Bali visa was approved! Now what?
Congratulations! Click the "Download" button in your approval email to access your visa and save it somewhere easily accessible.
I recommend printing it out as well as having a copy on your phone as back-up. When you arrive in Bali you'll also need to show them your onward ticket in order to clear immigration, so print a copy of this too.
Bali Tourist Levy
You've sorted your visa online, did you know you can also pay the Bali Tourism Levy online?
Like the VoA, the Tourism Levy used to be something you paid for on arrival at the airport in Denpasar but can now also be pre-paid online. It's around NZD$15 and payment will generate a digital receipt you need to carry with you.
You'll need a credit card, your passport and arrival date to process the Levy online.
Before you go...
There are two final steps you need to complete before you head off to the airport for your Bali break:
Both are compulsory for entry to Indonesia and need to be completed within 72 hours of your departure from New Zealand.
TOP TIP: You'll need your flight number and seat number to complete these, so if you haven't pre-booked your seats you'll have to wait until after you've checked-in for your flight.
Need help planning your Bali getaway?
Getting your eVOA sorted is just the first step toward a smooth, stress-free holiday. If you'd like expert support planning your Bali trip from start to finish, just get in touch. I’d love to help you turn your holiday ideas into a perfectly tailored itinerary.
Disclaimer: Please note I’m a travel advisor, not an immigration specialist. The information in this post is based on my personal experience and research, and is accurate to the best of my knowledge as at 9 July 2025. Visa requirements can change without notice, so I always recommend double-checking the latest details with the official Indonesian immigration website or a licensed immigration professional before you travel.